


Tracee Dundas Fashion Editor:@fashionablyyoursnola
Feeling Distressed
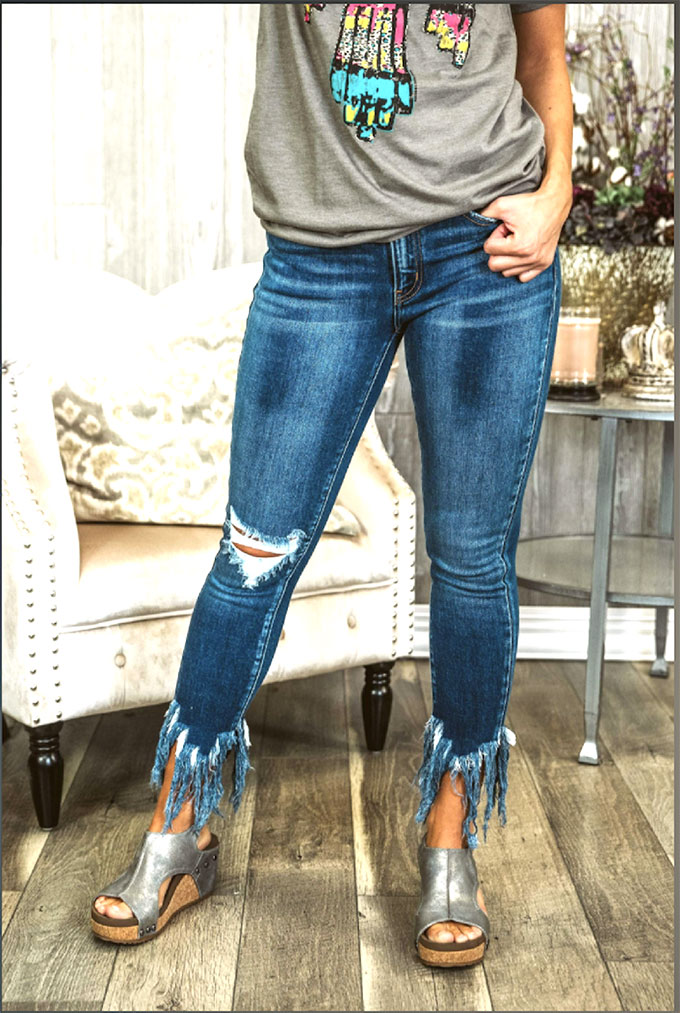
Just like baseball and apple pie are an American classic so are denim jeans. From Levi’s to Guess, denim has been around for many generations and everyone loves wearing them. And why not, denim is fashionable, can be dressed down or up and the trendiest apparel in modern time. It’s always in style! But let’s face it; in order to own the latest pair of designer jeans you may have to sacrifice mucho dinero.
So how can you get that designer style without the designer cost? Consider DIY (doing-it-yourself).
Here is an easy step-by-step guide for getting designer distressed denim style at a fraction of the cost. It’s easy, fun, and how cool is it to say; “I designed this myself!”
• Start with a pair of blue jeans that you’ve decided you won’t wear anymore or pick up a pair at the local thrift store.
• Looking at yourself in a mirror wearing the jeans, determine the length you would like them to be as shorts. Place a small mark at this point. Take off the jeans.
• Using a marker, draw a line on only the front of one pant leg. This line should be an inch below your original length mark to allow for fraying. Remember it’s easy to cut more fabric if necessary, but once you’ve cut the fabric you can’t add it back on.
• Lay the jeans on a flat, smooth surface with front of jeans facing up. Cut only one leg across your marked line with scissors.
• Use the finished cut leg as a template to cut the other leg evenly by folding the cut leg over the other, smoothing out, and use the same technique to cut the second leg off.
• Put on your “new” denim shorts to make sure your lines are even, and the length is right.
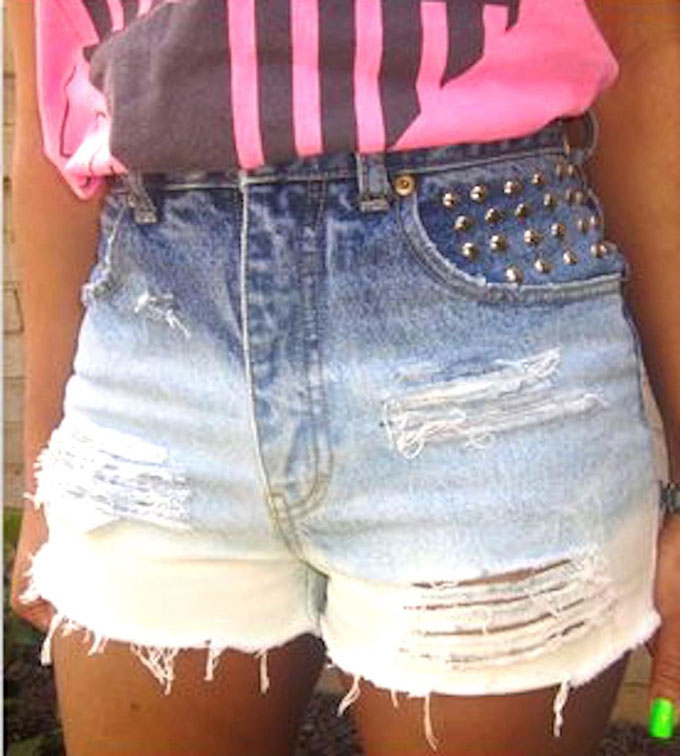
• Time to add the distressed look! Select where you’d like to have the distressed points on the shorts and make a small mark with your colored pen. Make sure your marks are not too close or you could end up with a huge hole!
• Pinch one area you marked and, using the tip of your scissors, cut a small slit in the center, followed by a short cut to each side to create one long cut across. Repeat this step at each distress mark you made.
• At each cut area use the tweezers or your fingers to pull down any threads to help get the fray finish started.
• At the cutline using a set of tweezers, pull out errant strands of thread you see along the entire hemline area. This will add fraying to complete the look.
• Toss the shorts in the washer and dryer to complete the fraying process.
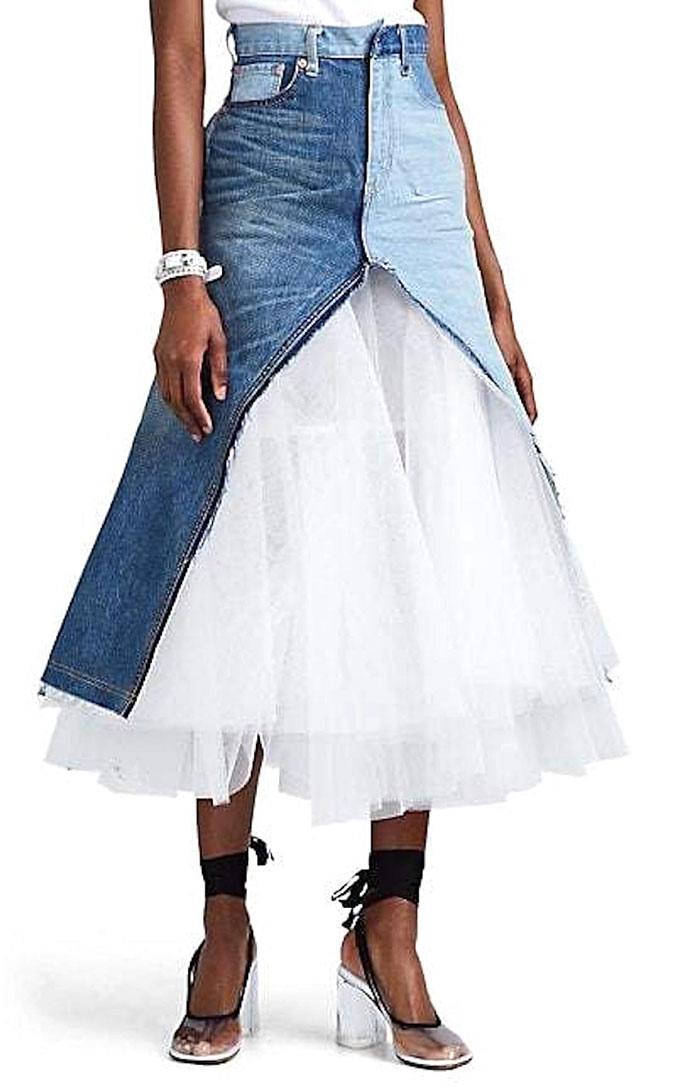
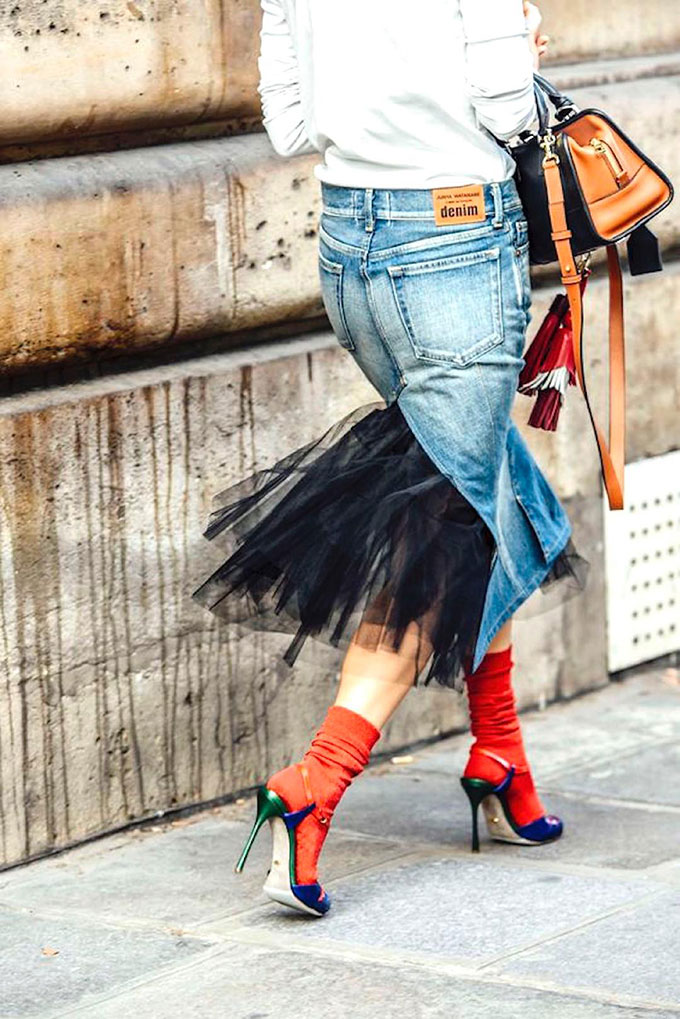
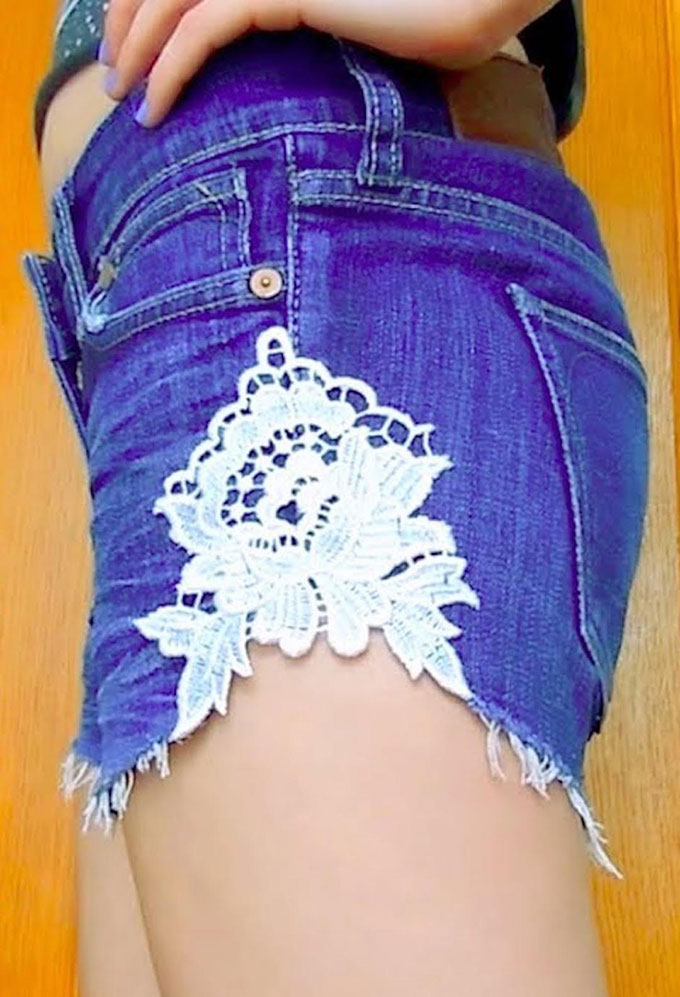
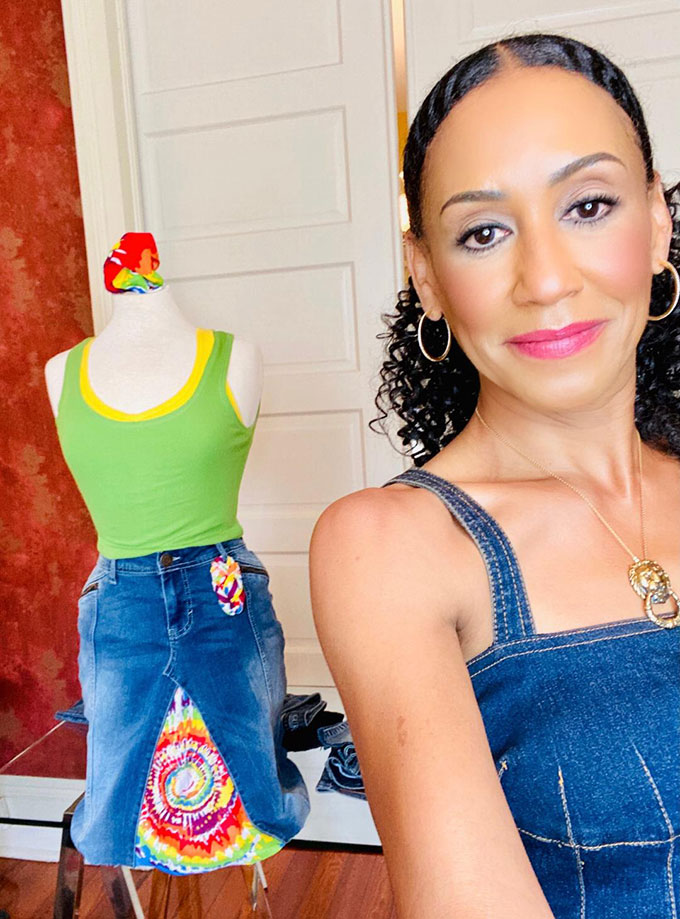
• Take your DIY project to the next level by inserting tulle or other fabric, lace applique, or create a tie-dye or ombré effect.
• The final look is a fun, fabulous, stylish pair of denim shorts that didn’t cost a small fortune and the best part is—you did-it-yourself!
Recommended For You.
Be the first to comment